Sportscode Building Blocks: Script a Passing Matrix in Minutes


Learn how to build a code window to capture passing data and review performance.
Note: The features outlined in this article are not available with Sportscode Gamebreaker Plus. Contact us if you’re interested in upgrading to Sportscode Pro or Elite, to take advantage of this type of analysis.
Sportscode’s powerful scripting language allows users to collect data and generate compelling visual reports linked to video. Creating reports is a common workflow for many successful users who have chosen to take advantage of Sportscode’s ability to display calculations from user-generated data.
A question we often get is how to track passing and receiving of the ball using Sportscode. Regardless of the sport, this data is useful in tracking player performance. In this blog we’ll show how just a few buttons in a code window can build an effective passing matrix.
Understand the Label Button Functionality
Label buttons are crucial in this setup, especially concerning the decision of when to apply information to code buttons.
- Create two code buttons and one label button.
- Connect a code button to a label button with an activation link.
- Apply the button before deactivations.
This means that the label button information will be “pushed” before the active state of the current code button. In other words, the information will be added to the last entered instance and not the current active code button. Feel free to try the differences. You will see the result in your timeline.


Where Does the Ball Come From?
Knowing where the ball came from is a little extra work. It requires more knowledge of the basics of scripting. Once again, a label button is the key element. Make sure each player’s code buttons have a button ID. This way, you’re able to change any buttons name in the future and it won’t affect the scripting. Using lead time or lag time is all up to you.
Add these four key scripts to your label button and you’ll be ready to start coding. Create the label button (in green). Within the label button we can specify a couple of actions.
- $name1 = BUTTON NAME “player1”
This script references the button with ID "player1".
- if (button #’player1’ state = 1, RENAME $name1)
When the code button with ID “player1” is active, rename this label button and give it the exact same name. This way you know which code button with a player’s name was pressed for the last time.
- if (button #’player1’ state = 1, RENAME GROUP “FROM”)
Change the group name as well. It makes it easier to organize your labels and to read them in the matrix.
- $start = COUNT INSTANCES WHERE ROW = “START” etc.
This is an optional little trick. Before you start the game you’ll want your key element label button to be empty. You're asking the script to check for a subject, in this case with the name “START”. If no instance is found within the timeline, rename your label to either nothing (“”), or in this example, “START”. It gives you an extra as well - the “START” label will be added to to the first player that has the ball. Remember to always press “START” (grey) at the beginning of the game and again after you finish the first half or quarter.

Checking the Result
After repeating the scripting process above for each player, you will immediately see the result in your timeline. The label information is visible within the instance. In this case, you see an instance in the row of Player 2. And from whom did he get the ball? Exactly: FROM > PLAYER 1

Combining Both FROM and TO Ideas
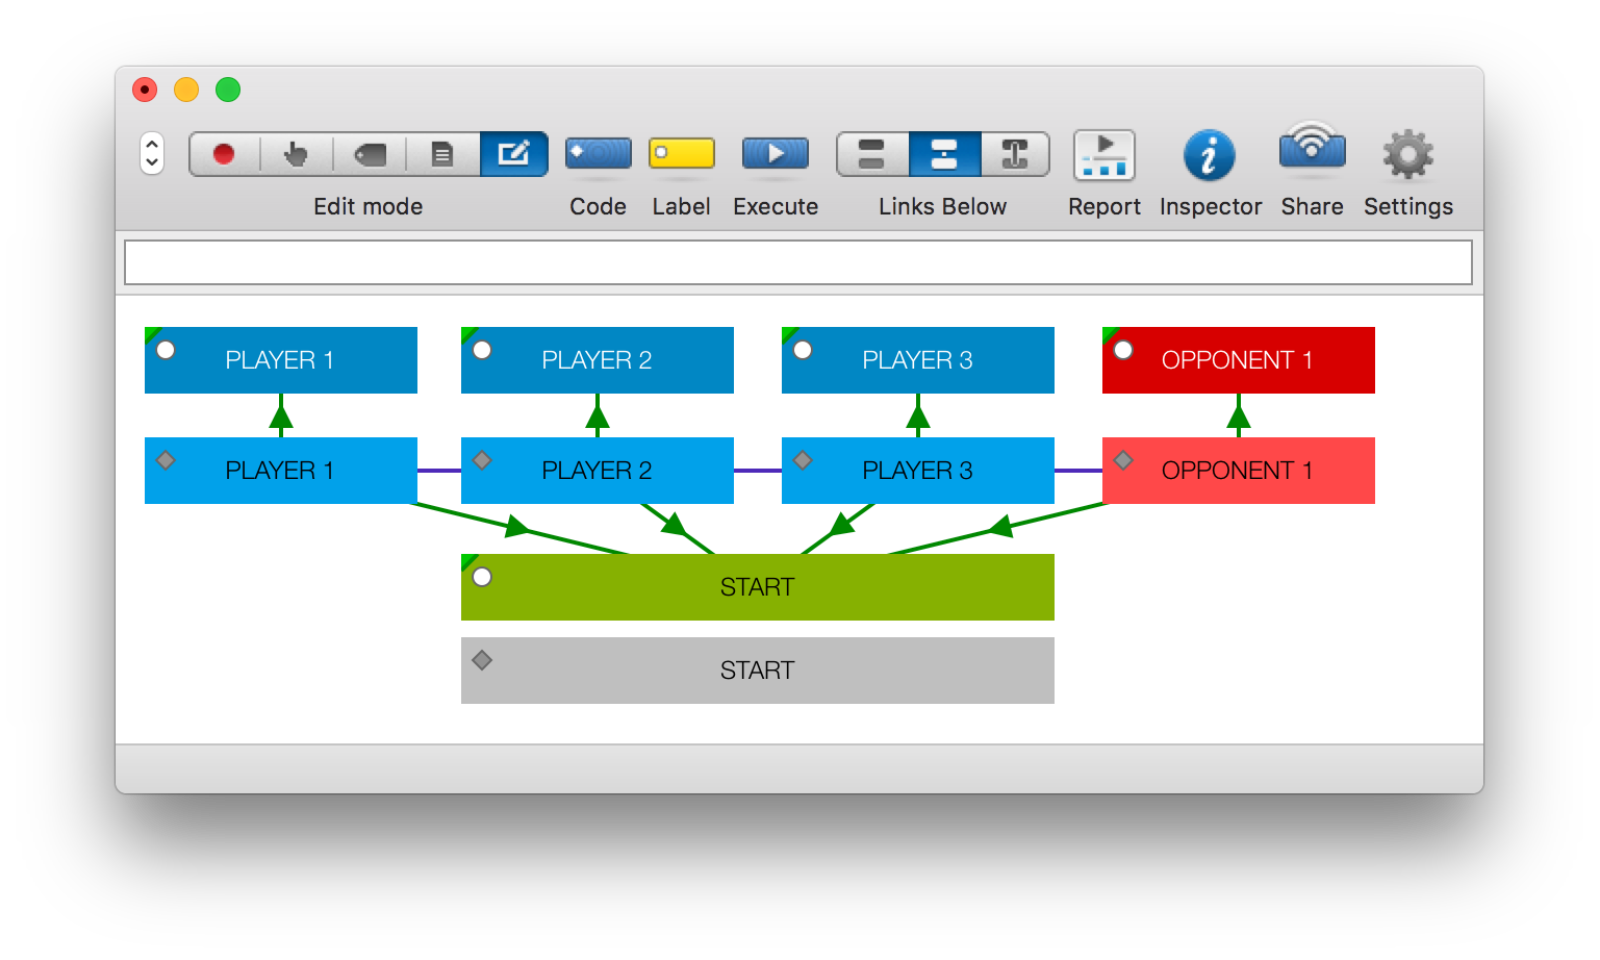
Here’s an example code window with a couple of players and one code button for the opponent. The top row contains the label buttons - you know this because the identifiers are shown. Second is the row with your players’ code buttons and at the bottom are the key element label button containing some scripts. Adding the opponent button enables you to track which player lost or won the ball most.
Three Data Points in One
And now for the fun part! For every instance in your timeline, you now know where the ball came from and where it goes. This way you’re able to check who was involved in any specific player’s action. With just one instance, we know three pieces of information at any time while reviewing the video:
- Who passed the ball
- Who has the ball at this specific moment
- Who will get the ball next
Review Results in the Matrix
Open the matrix and play around with swapping axes. If you upload this timeline to Hudl, you can share this analysis with the rest of your staff and your players.

Be Creative
Last but not least, we encourage all our users to be creative with Sportscode. After you gathered data like this, you could create custom reports, heat maps or gather these statistics in a statistical window to use it in combination with third-party tools.